Canted Coil Spring (one item)
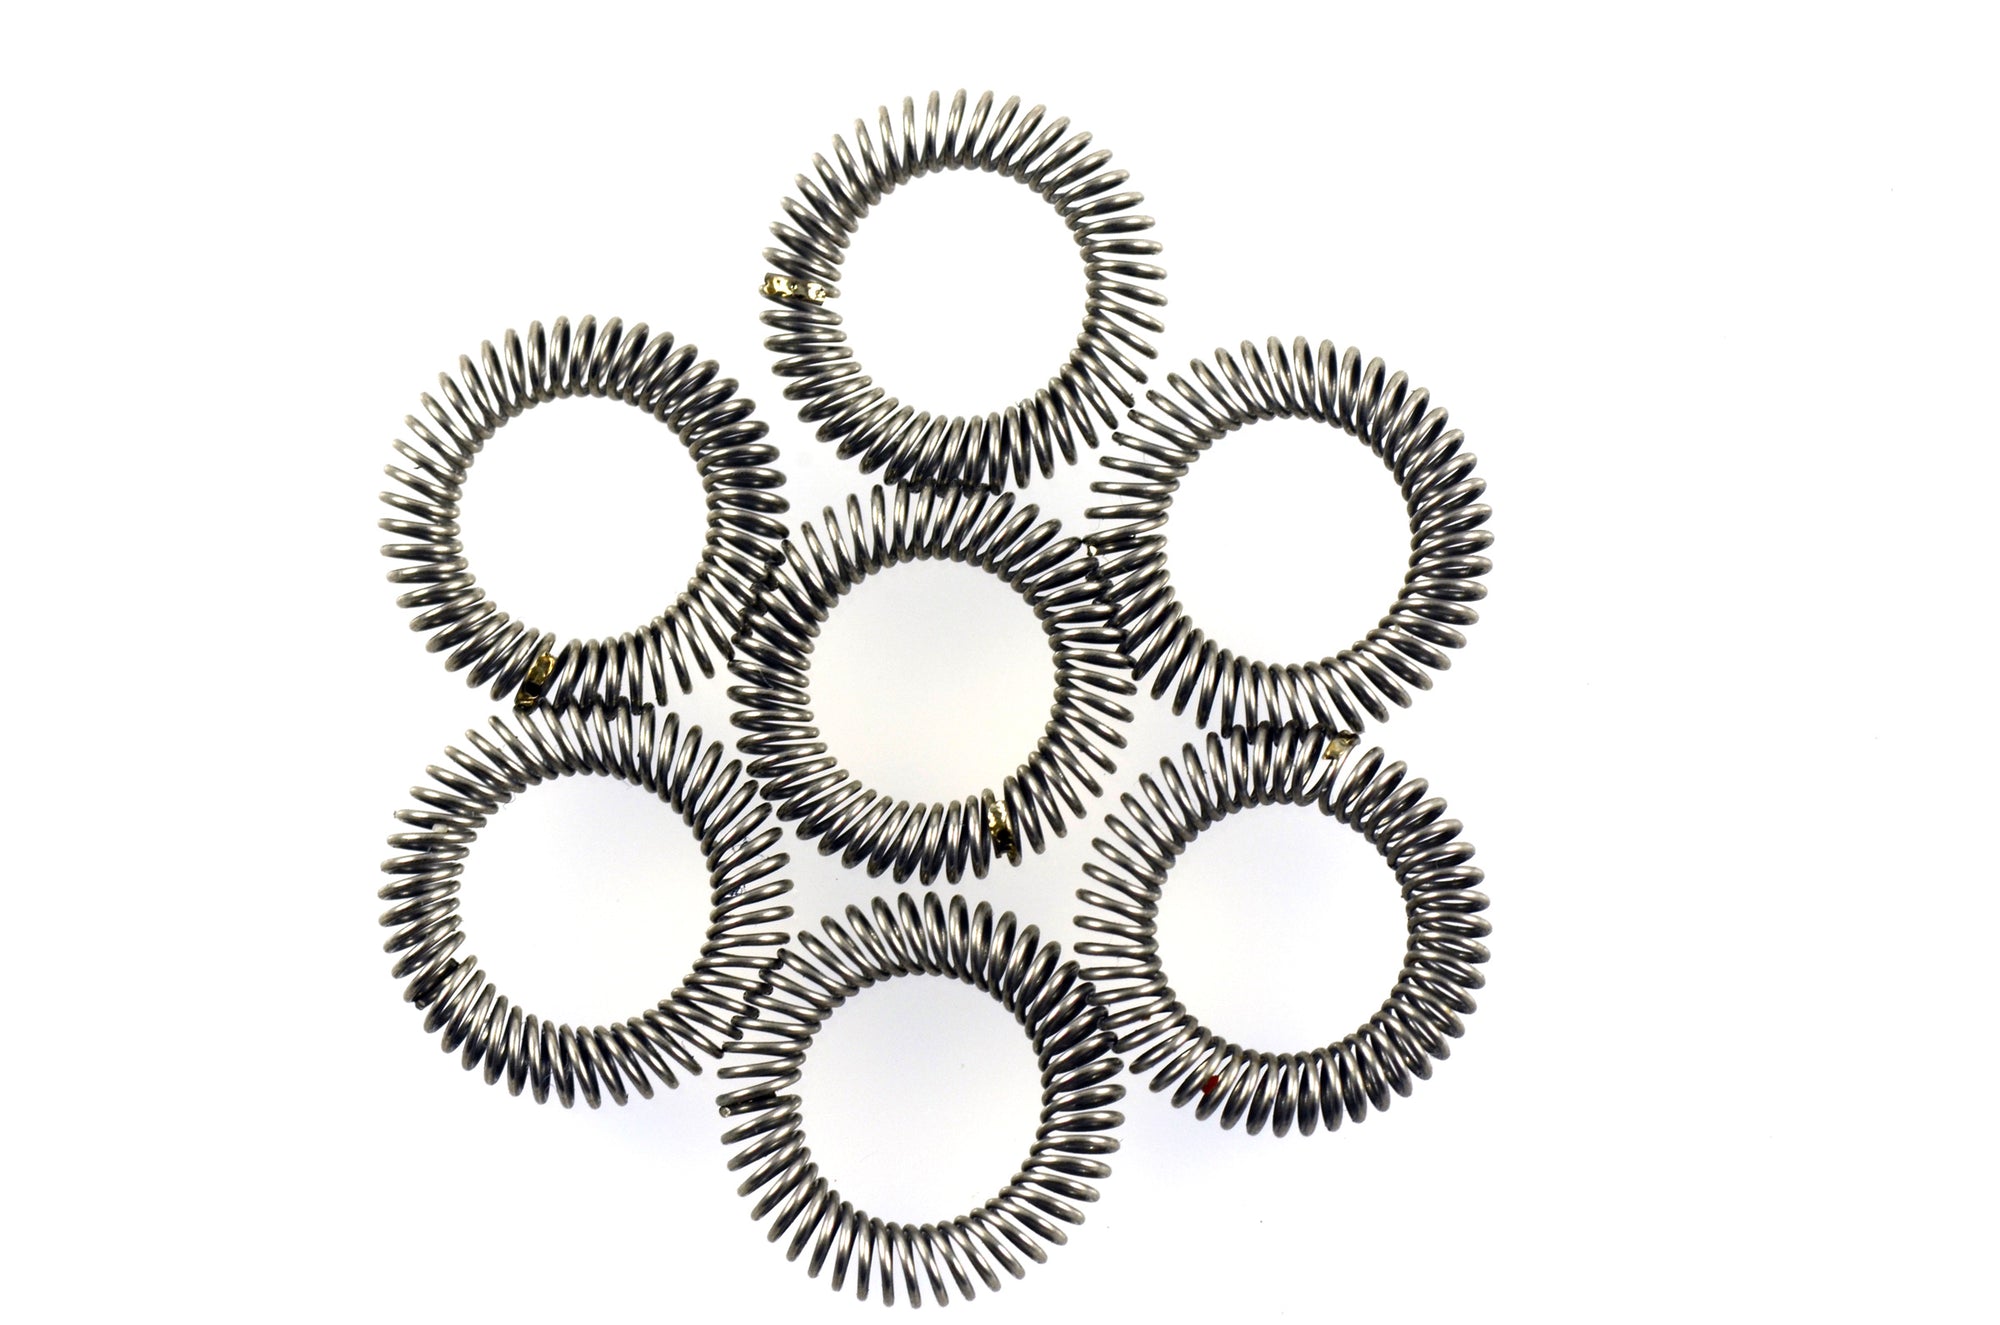
These proprietary (made just for me) canted coil springs make the magic happen in our QR Compatible products.
It's very rare, but sometimes a spring can become damaged. Damage sufficient to negatively impact the springs function is normally severe/obvious. The spring can actually tolerate quite a bit of damage before the function is compromised. Fortunately replacing them is easy. Are you tough enough to do it yourself?
Normally springs last for years. I've been using the Kappas on my kechain since 2015 and I've never had any issues. However, if you do have a problem, the spring can be replaced in about 30 seconds. Just be sure to follow the installation instructions in the "operation" section below or your QR will not function properly.
Springs are considered a consumable "wear item" and are warranted for 12 months from the date of purchase.
My canted-coil-springs are custom manufactured specifically for the Beta-QRv2 by a US company who specializes in canted coil springs...literally the only product they make. Normally these are found in connectors for military, medical, and aerospace applications. This little beauty is the single most expensive component of the Beta-QRv2.
These are manufactured from 302 Stainless Steel: drawn, coiled, cut to length, and the ends are laser welded together. The springs on your screen are about 10x the actual size. It's a ridiculous achievement in manufacturing to make something this tiny...and then weld it together so the diameter of every spring is accurate to within less than the thickness of a sheet of paper.
Installation Notes: The spring can be removed with a pair of tweezers, this may do permanent damage to the spring...but you are replacing it anyway. Just don't expect to remove a "good" spring without damage.
Each spring has a tiny weld (shiny spot - see product photo). The spring MUST be installed with the weld facing "out" of the hole in the flashlight (or keychain) body. The spring will not function properly and the QR may become very difficult to remove if the spring is installed backwards. See, you were warned ;)
Just insert one edge of the spring into the hole. It will normally drop past the groove. Use a pick (even a toothpick) to raise the bottom edge of the spring up into the groove. Once that is seated you can push the rest of the spring down and it should snap into place.
-
materialheat treated 302 stainless steel
-
where it's made

